So you got your new android phone version kitka 4.4 which has amazing all new features like all fresh and new cool design. Some features includes are the new dialer has now a search function where you can search your business contacts and will bring out all the businesses contact details where you are located.
Using this you can also check callers that has no saved info on your phone by checking all the businesses contact information. Sounds too great right? But that’s not all there are bunch of it but we won’t tackle anymore on that since this post is titled “How to Root Android Kitkat”. This tutorial is very basic even beginners can do this.
Note: This Tutorial is working on all kinds of Android Version as well. Kitkat, Jelly Bean, Gingerbread etc.
Why Root your Device?
Having a Rooted Android phone allows you to get to know more your phone. It will give you access on the phones Operating system for greater customization you want! You should be aware that there are amazing apps that needs rooted phone to be installed. Pretty great huh now carry on.
Getting Ready:
- We need your Android phone of course. (Marshmallow, Lollipop, KitKat, Jelly Bean and Gingerbread)
- A Windows PC
- A USB Connector to connect your phone to your PC
- Download and Install Kingo Android Root a universal Android Phone Root Software for Desktop
NOTE: Download ADBDRiver and install it on your PC you must have this first before starting anything. This recognizes your phone on your PC so debugging will take place.
Instructions:
Now that you have everything setup we are now ready to Root our Kitkat device. Read carefully the step by step guide below.
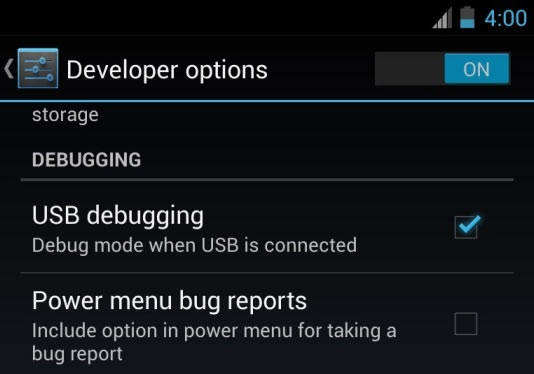
- Put your Android Phone on Debug Mode. See image below.
2. Use your USB connector to connect your phone and your PC.
3. Now that you have Installed Kingo Android Root software on your PC. Your device will be automatically detected if you connect it to your PC.
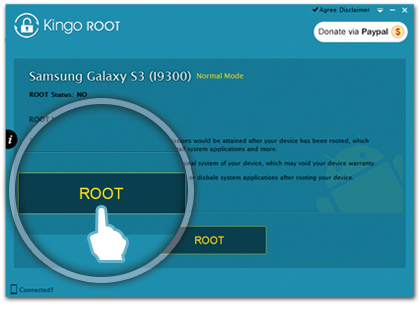
4. Your device name and version will be displayed just like the image below. Now all you have to do is click “Root” below.
5. Now just wait while the software is running. You will be notified if the root process is success or not.
6. If success you will see a Super User app installed on your Phone.
And that’s it! That’s fairly easy right? Now, get your kitkat android phone and root is for free! Goodluck jailbreaking your Android KitKat!
Can’t Root? Try this!
You must have forgot to install ADBDriver on your PC this fails the debugging mode and can’t do the process within your phone. So install it first and try the root process again.


thank you for this tutorial… works on my Samsung Grand Prime
Your method is not only effective, but also easy to follow. Great job!
Your method is not only effective, but also incredibly well-organized. It’s clear that you’ve put a lot of thought into the structure and flow of the information.
I can’t stop raving about this method, thank you for bringing it to my attention.
This method is seriously life-changing, thank you for bringing it to our attention.
I appreciate the thoroughness and clarity of your approach. This method is excellent!
I’m so glad I found this method, thank you for sharing it.
This method is a game-changer. It’s made problem-solving in X so much easier. Thank you!
I have a inquiry about the post, where can i get in touch with
the author?
can i root my micromax canvas fire 2 with kingoroot? plz mail me at [email protected]